Thinking about using Pardot Landing Pages or Forms? You’ve come to the right place. Before you can build your first Landing Page in Pardot, you’ll need to have your Layout Template ready. But what if you are not sure where to start? Then go ahead and read on!
What’s a Layout Template?
Layout Templates are used to format Landing Pages and Forms in Pardot. The best way to think of them is as reusable structures which define how your content is positioned on your page.
Pardot Templates are all built using custom code. There are a few ways you can approach building yours:
1. Use one of Pardot’s pre-built templates
When you start to create a Layout Template, you’ll see a handful of pre-built responsive options to choose from, such as:
- Gated Content
- General
- PPC/SEM
- Sales Ready
- Webinar Event

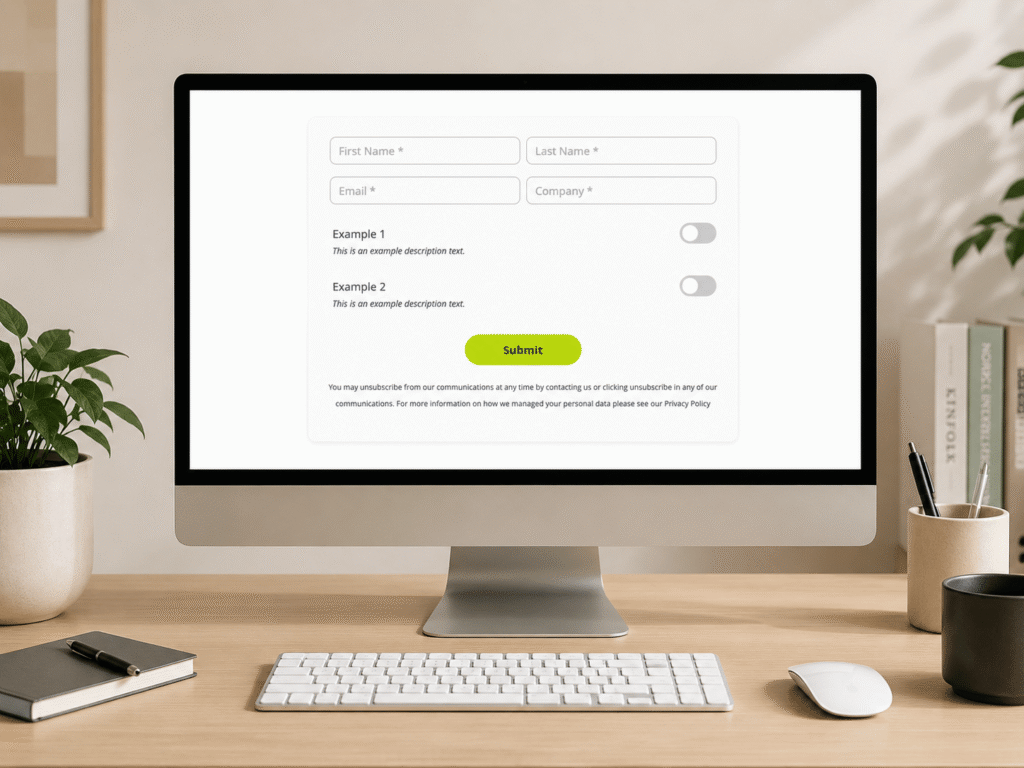
You’ll see if you preview any of these, that they are very basic, and will not have any of your branding on them. It’s quite a limited selection, but it’s a starting point, and an easy one if you’re not code-savvy.
Once you’ve imported any of these, you can then change anything you need to within the Layout Template code. If you don’t have internal resource to do this, get in touch with us. Alternatively, you can use the Layout Template as it currently is, then make any changes in the Landing Page editor when you create your Landing Page. You can find out how to do this step by step here.
As you can see in the screenshot below, you have access to edit certain sections on the page in your editor. The downside to doing it this way, is that you’ll have to make each and every page you do in the style of your company branding from scratch.

Pardot also have a selection of ‘Stock Templates’, which can be accessed from the Landing Page editor. You can take a look at those by following these instructions.
Remember, if you’re looking to style a standalone Form that you will iFrame on your website, you will not be able to use any of these templates, and will need to work from scratch. Get in touch with us if you’re looking to do this.
2. Use in-house development resource or consultancies / agencies to build them for you
If you’re lucky enough to have in-house front end developers who can build Layout Templates for you, then it’s worth showing them this blog post, as this may be different to other Layout Templates they have built before. If you go down the external resource route, make sure you choose a partner who has experience building Layout Templates specifically for Pardot.
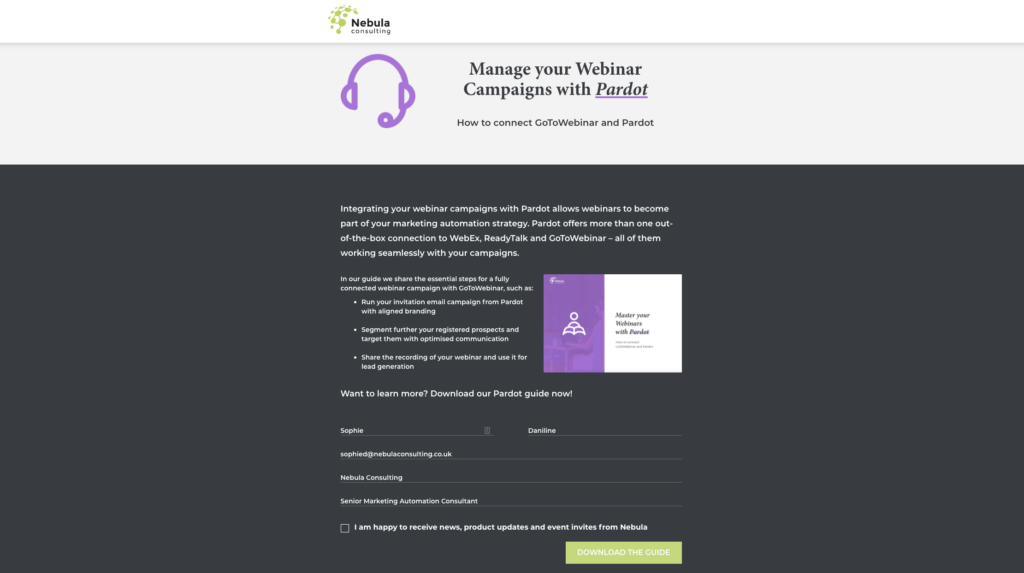
The best part about going down this route, is you can be descriptive about what you’re looking for. Check out this Landing Page, hosted in Pardot, that we built using one of our custom-made Layout Templates:
3. Import from a URL
If you don’t want to start from scratch, you can import any webpage into Pardot, and then optimise your editor. Find a simple page on your website (e.g. your Privacy Policy page), and include the link on the Pardot Layout Template import layout section:

Be careful using this option, as your Pardot Landing Page doesn’t have to be as complex as your website. With Layout Templates you should aim at creating the same customer experience as on your website, while focusing your prospects attention to particular topics and submissions.
Part of this process will involve you checking the code to prevent any cross-referencing tracking issues, so this is only something we recommend if you have a team of front-end experts in-house.
Understanding Layout Template Components
In each Pardot Layout Template you can see 3 tabs displayed:
The Layout Tab
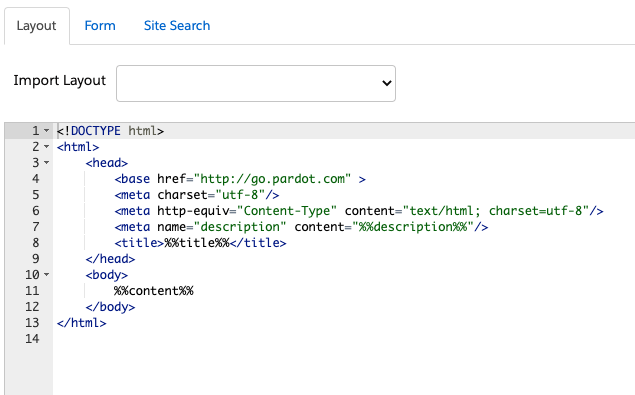
The Layout tab controls the look and feel of your Forms and Landing Pages. You will need to add your custom code to this tab to style your assets.
You can see from the above screenshot that there are three key tags that should be included in your layout:
- %description% – This gives search engines details about the contents of your Landing Page. It’s essentially a meta-description for your Landing Page. It pulls in the description you have specified in your landing page set up.
- %title% – This will display in search results, and on prospects browser tabs. It pulls in the title you have specified in your Landing Page set up.
- %content% – This tells Pardot where your form should appear on your Landing Page.
If you decide you want a Form on your Landing Page layout, or you’re building a Layout Template just for a Form, you will need to make sure to include the CSS styling for both the Form and the Landing Page itself. You can take a look at how to target your Form specifically here.
The Form Tab
The Form tab controls the structure of your Forms. It contains tags such as %%formfield-input%%, which tell Pardot how to arrange form elements in the browser.
Generally, you won’t need to edit this tab much. You should only modify its contents if you need to rearrange or remove certain form elements. For example, you could move %%form-field-input%% above %%form-if-field-label%%, and this would make your field labels appear below your form fields.
The Search Tab
This tab was previously powered by Pardot Site Search, a feature that has been deprecated. You will not use this tab.
What next?
Now that you understand the basics of Pardot Layout Templates, you’ll need to decide if you want to tackle building one in-house, or if you’d rather get a consultancy to help you out. If you decide the latter, get in touch with us here.