In Part 1, I talked about getting Pardot Forms Working in WordPress specifically when using a standard Pardot form. This time, I’m going to focus on how to use Pardot Form Handlers in conjunction with WordPress.
Contact Form Plugin
The Contact Form 7 Plugin can be configured to integrate with Pardot Form Handlers. There’s a high chance you will have this plugin installed already as it’s fairly popular. The main benefit to using this plugin in particular is that any form you put in will inherit form styles that already exist on your website.
Here’s how you do it:
- Install and activate the Contact Form 7 Plugin. For this to work, you will also need to do the same with the 3rd Party Integration Plugin (this is what allows you to integrate with Pardot).
- Create a new form under ‘contact’ (if you don’t want to create a new form, you can simply edit the default form that is provided.
- Now, jump back into your Pardot account and create a new form handler.
- Leave the ‘success’ and ‘error’ locations blank (they wont be used as part of this process)
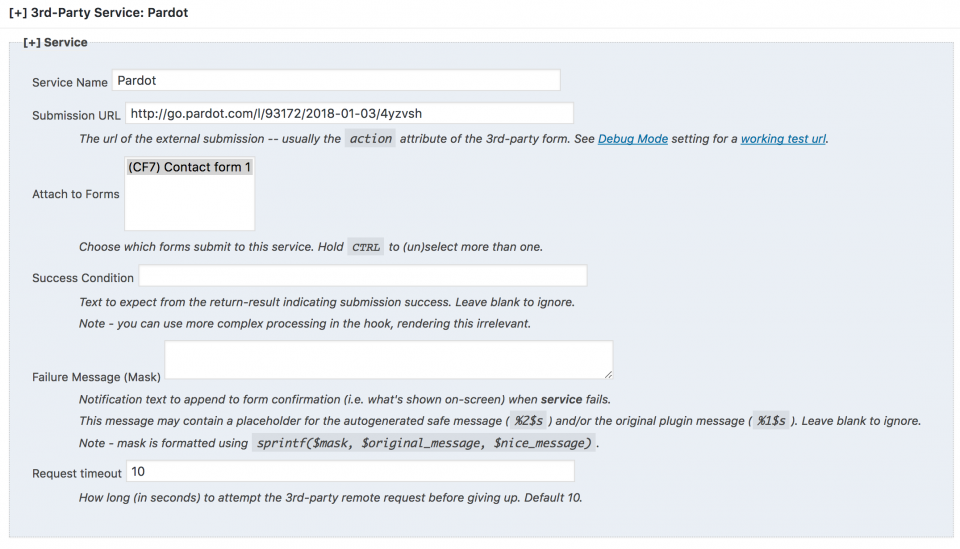
- Pop back into WordPress to Contact > 3rd Party Services
- Add a new 3rd Party Service
- Name can be anything that makes sense to you
- Submission URL should be the URL of your form handler (found in your Pardot account)
- Select the form you want to use

- Now, you’ll need to map your fields within Contact Form 7 to your Pardot form handler. (It’s generally best practice to keep the names the same in both)

Wrap up
Unlike part 1, there are not so many ways of doing this. If you need help getting up and running with form handlers in WordPress, get in touch with us. If you’re a super Pardot WordPress genius and have got another way of doing it, I’d love to hear from you.
Not a WordPress user, but still want to find out about form handlers? You can find out more here.


