NPS, or Net Promoter Score, surveys are a great way to monitor your customer experience in a consistent and well established way. A simple score from 0 to 10 tells you how likely a customer is to recommend your business. And it allows you to track changes in customer experience over time.
Typically, surveys are hard to set up in Pardot because Forms are linked to Prospect fields. And you don’t want to end up creating a whole bunch of new fields every time you send out a survey. This is where the simplicity and consistency of NPS surveys makes them perfect for Pardot!
When you set up NPS surveys in Pardot, you can automate everything. From triggering the email invite, to capturing the survey submission, and reporting on the results effortlessly from Salesforce. The process is simple, but effective, so let’s get started.
Fields
The first thing you’ll need to do is set up custom fields in Pardot and Salesforce to trigger NPS surveys to be sent and capture the results. Create all of these fields on the Prospect record in Pardot and also on the Lead and Contact records in Salesforce.
TIP! Don’t forget to map your Lead fields to the equivalent Contact fields.
| Name | Field Type | Values | Sync Behaviour |
| Send NPS | Dropdown (Checkbox in Salesforce) | true false |
Most recently updated record |
| Most Recent NPS Sent | Date | Use Pardot’s value | |
| Most Recent NPS Submitted | Date | Use Pardot’s value | |
| Most Recent NPS Score | Number | Use Pardot’s value | |
| NPS Positive Feedback (optional) | Textarea | Use Pardot’s value | |
| NPS Improvements Feedback (optional) | Textarea | Use Pardot’s value |
Your Send NPS field will provide the trigger for sending the survey. If you wish to hand-select your survey recipients, you can manually populate this field. Or, it can be automatically populated using Salesforce or Pardot automation, such as Flow or Automation Rules.
The two date fields will track how recently a customer has been sent and completed an NPS. So you can regulate how often you are surveying your customers.
You will be adding the score and feedback fields to your survey form to capture customer feedback.
Setting up the survey
Once your fields have been created, the next step is to create the Form to host your NPS survey.
Firstly, add your survey fields to the form, as well as the Email field, and make sure they are all set to ‘Always Display’.
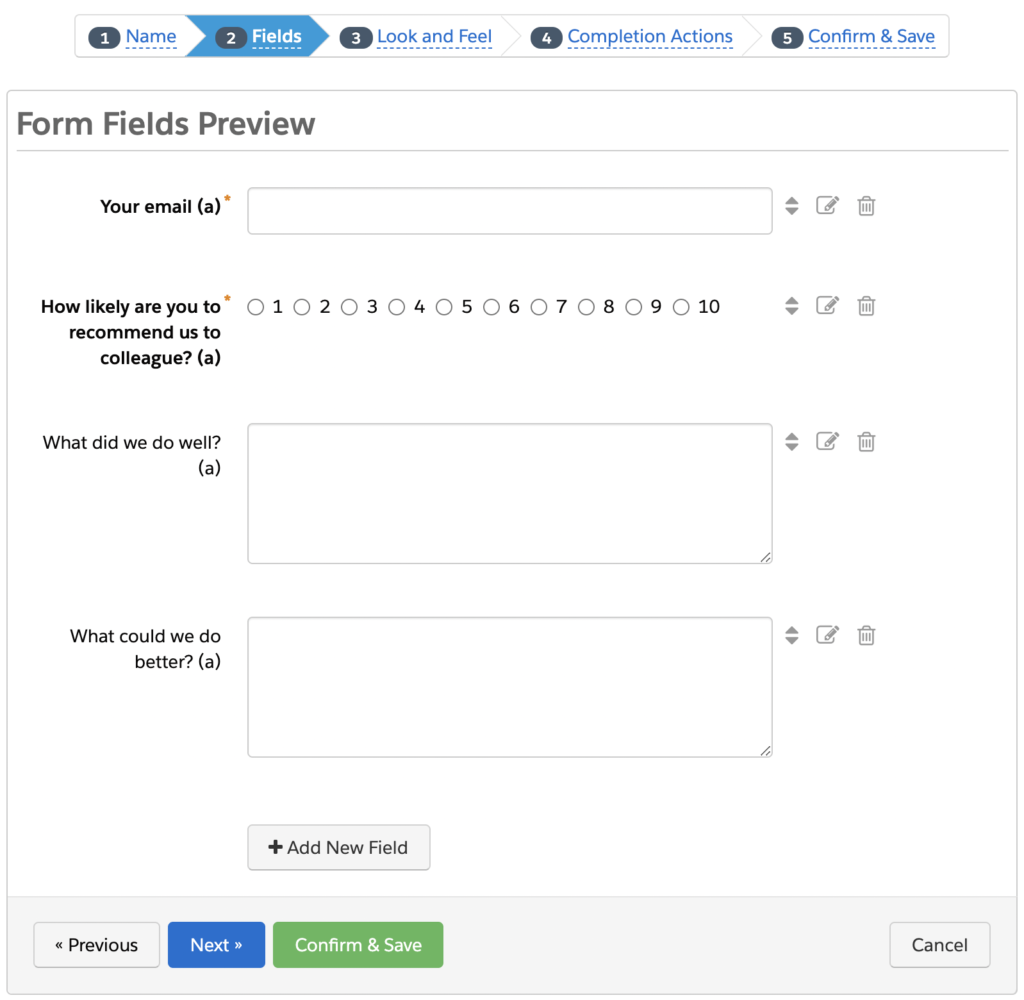
Add a Completion Action to your form to set the Most Recent NPS Submitted field to today. This will make sure you accurately track the date that your customer last completed the NPS survey.

Embed this form in a page on your site using the iframe code, or added to a Pardot Landing Page.
Inviting your customers
Now that you can capture their responses, it’s time to invite your customers. To do this, you’ll need to create an Email Template, a Dynamic List and an Engagement Program:
Email Template
My recommendation would be to keep this template as short and sweet as possible. It’s good to include the fact that this is a very short survey and that you really value this feedback.
Your call-to-action should link to the page hosting your NPS survey form, then you can publish your template.
TIP! Don’t forget to make your template available for Engagement Programs in the Basic Info section.
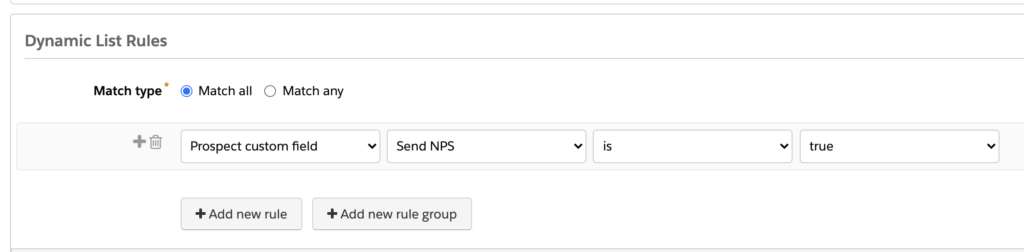
Dynamic List
This list will be the recipient list for your program. Prospects are added when the Send NPS field is ticked on their record and removed when it’s unticked. This means that people won’t stay on this list for long, and therefore it will stay empty most of the time!
Engagement Program
You’ll be sending NPS surveys via an Engagement Program, to leverage Pardot’s brilliant, time-saving automation. This takes care of all the field management and data capture without having to manually pull lists or batch send emails.

The first step in this program is a Rule step to check when the customer was last invited to complete an NPS. This uses the Most Recent NPS Sent field. You can choose your own timeframe, but I’d recommend only sending NPS surveys to each Prospect once a quarter at most. This will avoid customers feeling bombarded by surveys or the invite email clashing with your other marketing communications.
If they’ve received a NPS survey within the given timeframe, the program will not send another invite and will untick the Send NPS checkbox. I’d also recommend notifying your marketing admin here, by task or email, just to let them know that the NPS hasn’t been sent. If you ever need to override this timeframe and resend an NPS sooner, you could enable your invite template as a one-to-one template. Then you can send it manually from Salesforce using the Send Pardot Email button.
For customers eligible for an NPS invite, the Engagement Program will send them the template and mark the Most Recent NPS Sent date to today. The Send NPS field is then unchecked so that this Prospect can be reselected to receive an NPS invite in future. As Pardot is the master record for these fields, Salesforce will also be updated so Account Managers can easily monitor NPS feedback.
Collect your responses
When a prospect completes the NPS form, their responses will be captured in the survey fields and synced with Salesforce. An important consideration here is that if they complete multiple surveys, their historic entries will not be retained as the fields will be updated.
You may be asking why we don’t just turn on ‘capture multiple responses’ for these fields. The simple answer is that the responses aren’t time-stamped so you cannot tie them to a particular form submission. Imagine that someone completes the survey twice and only leaves written feedback on one of those. It would be impossible to tell from their prospect record which NPS submission that feedback relates to.
Therefore, to enable reporting of NPS scores over time, I would recommend enabling Reporting Snapshots on the Lead and Contact in Salesforce. Speak to your Salesforce admin, or our wonderful team of Salesforce experts, to get that set up.
Summary
In short, creating an effective NPS process in Pardot is really straightforward and an excellent way to track customer experience. Once the setup is complete your flow will look a little something like this:
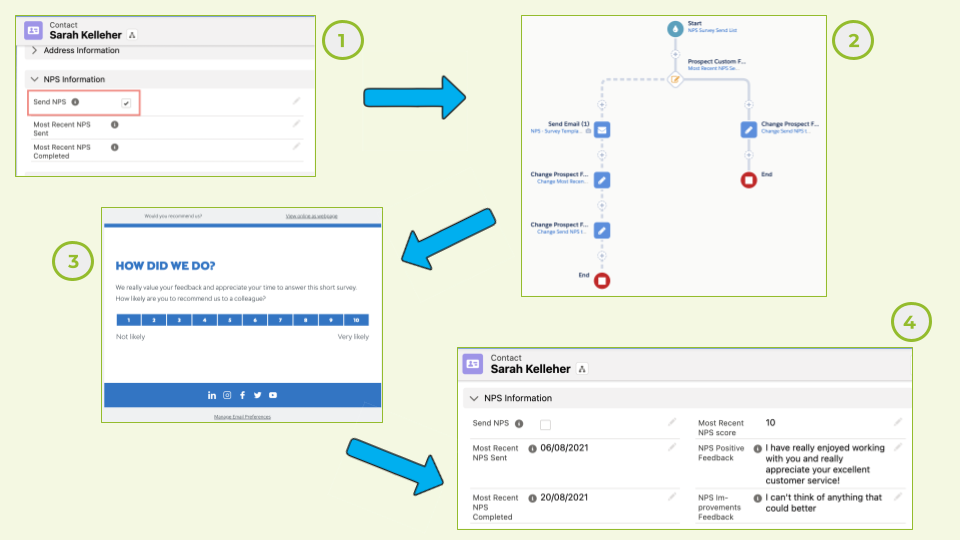
- Send NPS checkbox is ticked on the Lead / Contact in Salesforce
- Pardot Prospect enters the NPS Engagement Program which checks to see when they last received an NPS invite
- If they’re eligible, the NPS invite email is automatically sent to the Prospect
- Feedback is captured via a Pardot Form and synced back to Salesforce
And that’s it! Using only Pardot’s native marketing automation tools, you’ve built a fully-automated and reportable NPS survey. Now you can harness the power of feedback to boost your customer experience.
If you’d like some help getting started with NPS surveys in Pardot, why not chat to our amazing team of Pardot experts today?