Eventbrite is a well known platform for hosting and promoting events, and by integrating its registration functionality to your account engagement landing page, you can streamline the registration process for your audience.
In this blog, we’ll walk you through the step-by-step process of embedding Eventbrite buttons to your landing pages and styling them following your brand guidelines.
Access Your Event on Eventbrite
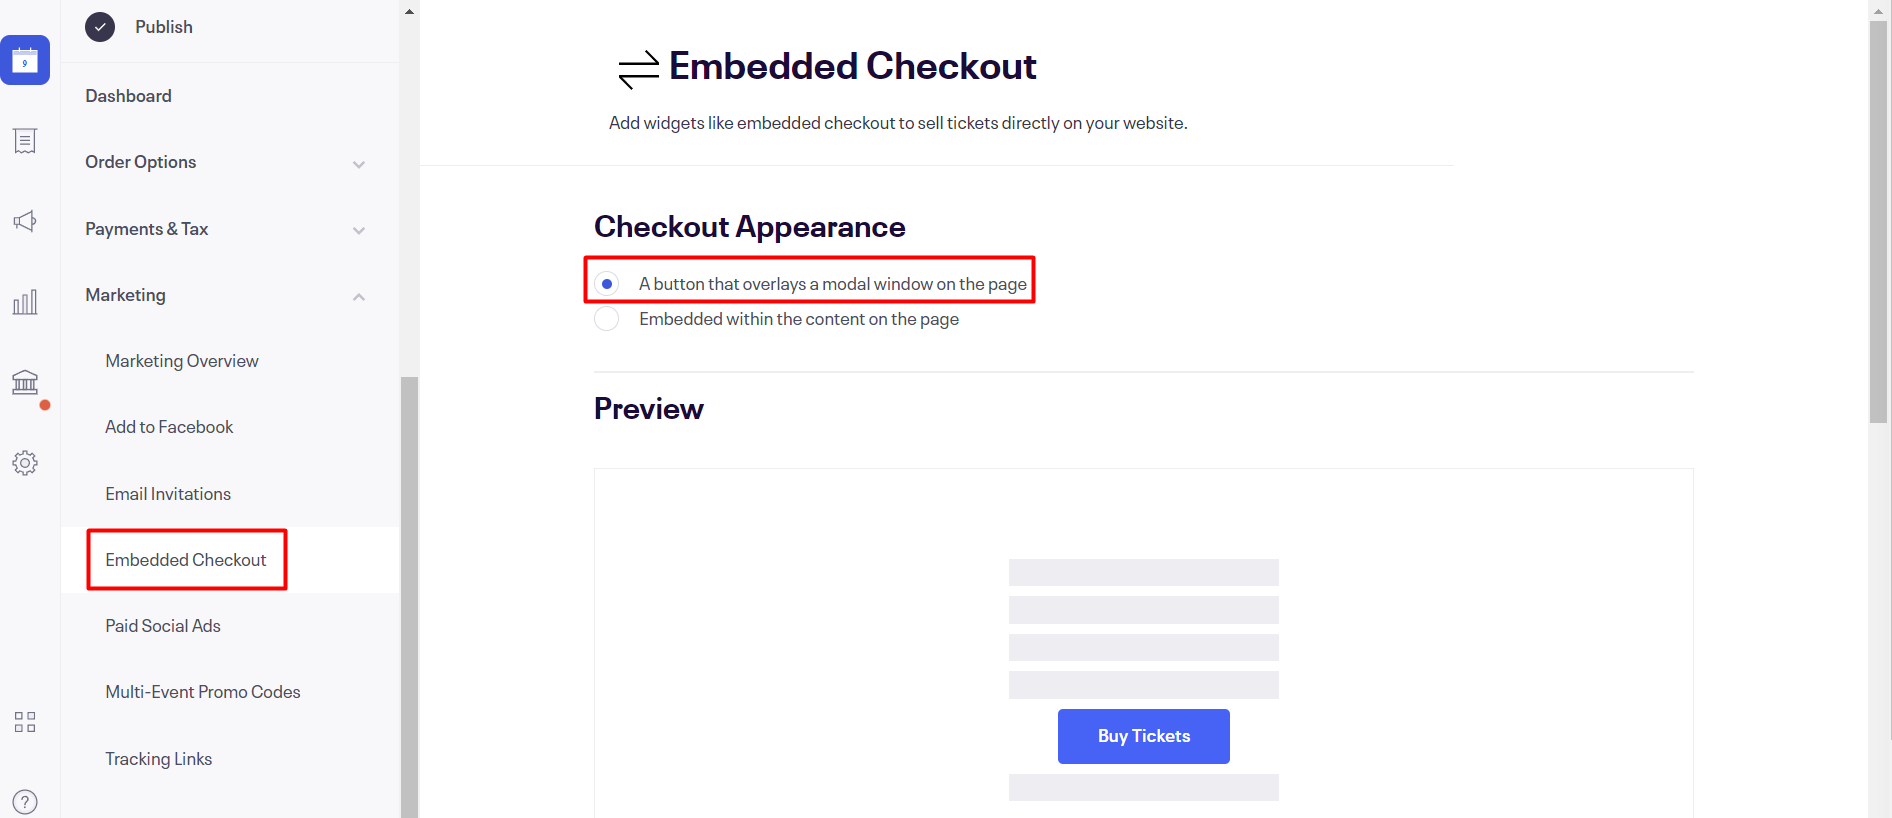
The first step is to log in to your Eventbrite account, then navigate to the event where you want to create a registration button. Click on ‘Embedded Checkout’ and choose the ‘A button that overlays a modal window on the page‘ option and copy the embed code.

Embedding the button in your Landing Page
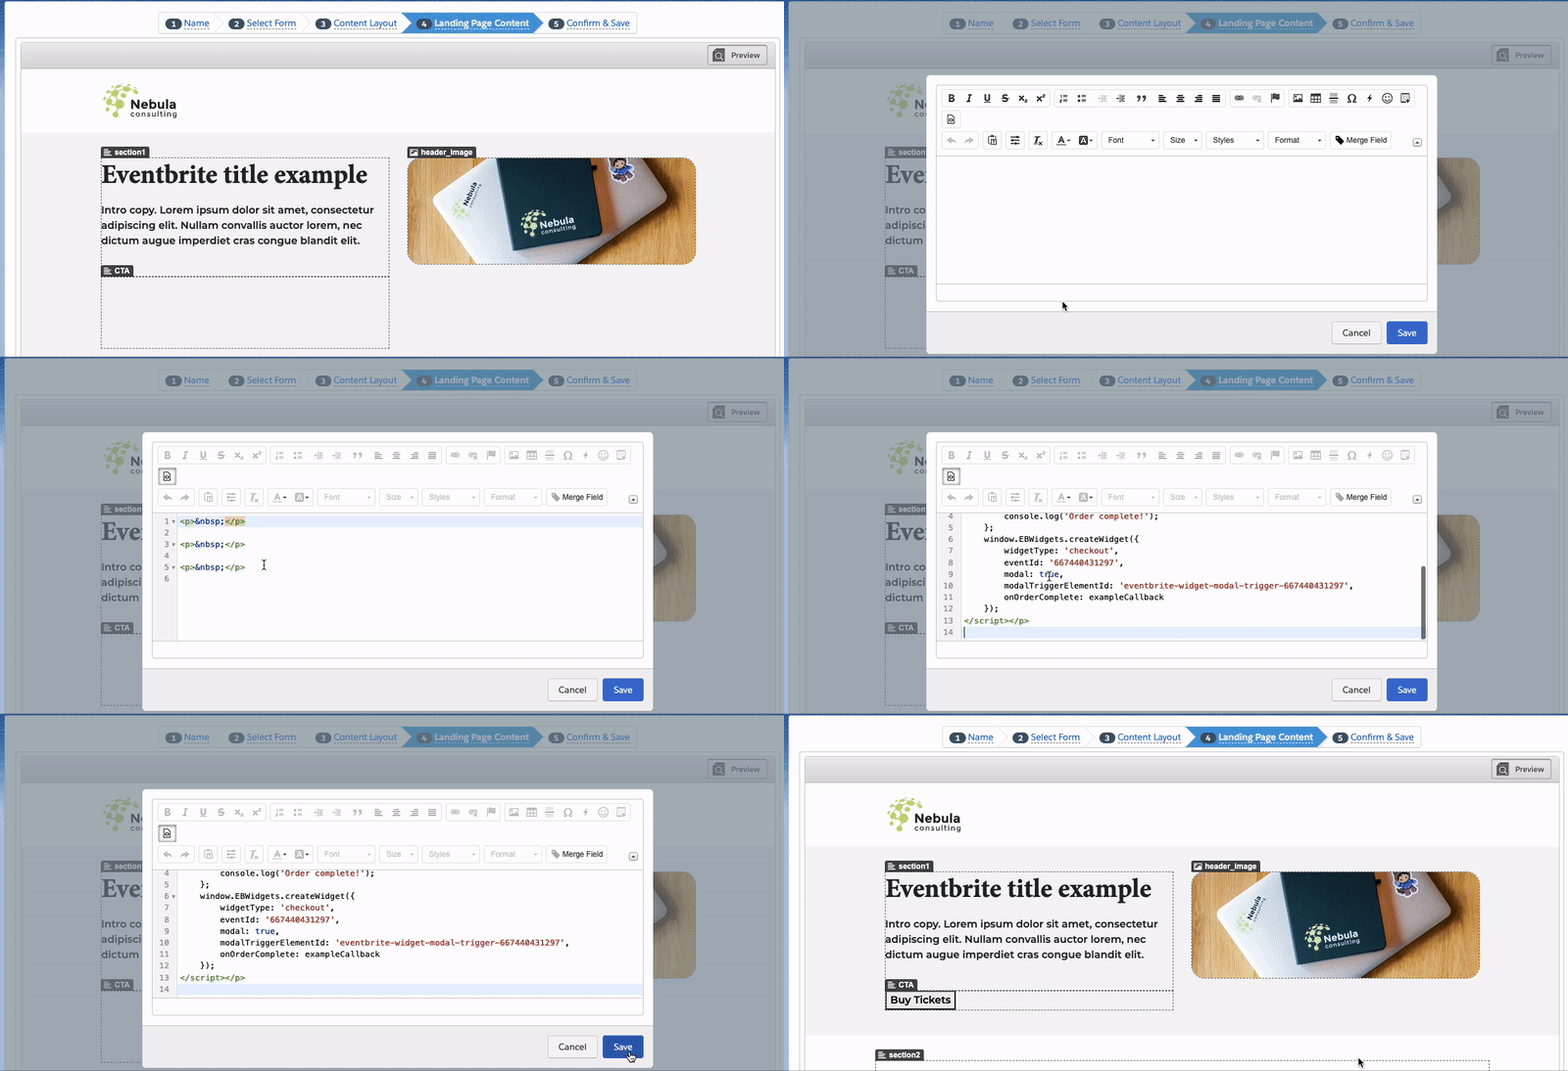
Now, navigate to your Account Engagement landing page editor. Depending on your landing page layout, you’ll want to paste the embedded code in a section where you can add custom HTML or embed code.
Customise the button appearance
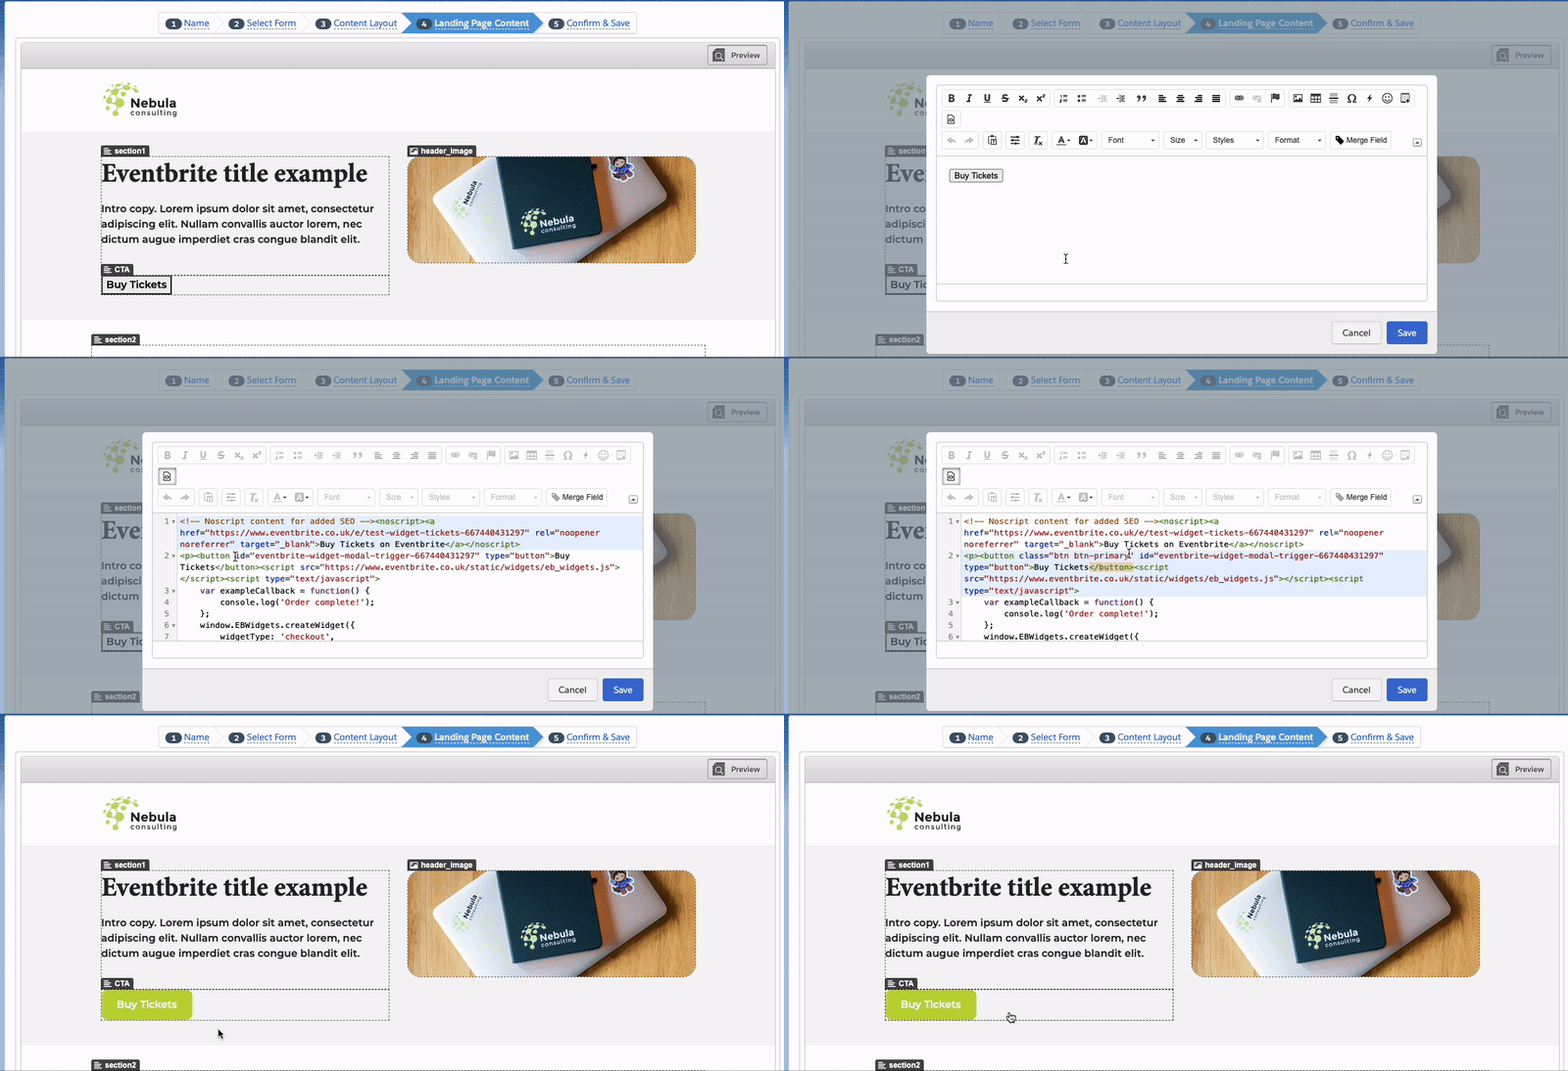
Lastly, you will want to customise the embedded Eventbrite button to align with your landing page’s design. This can be achieved by applying inline CSS styling directly to the button, or by utilising predefined classes that you’ve created for your layout template. In our example, we used the predefined CSS classes we created for this layout template. This approach minimises the risk of human error and ensures consistent styling throughout the landing page.
Preview and Test
After embedding the button, preview your landing page to ensure the Eventbrite button displays correctly and functions as expected. Click on the button to test the popup registration flow on your landing page.
By following these steps, you will be able to embed and style any Eventbrite registration button into your Account Engagement landing pages.
If you have any questions or need assistance with working on Landing Pages we’d be happy to help. Please get in touch here.


