
During the configuration of a new feature anyone can face certain challenges, like when you need to work in a third-party platform all of a sudden. In this post, I’m here to tell you how I came across mine, when I recently used Workbench for Campaigns.
What is Workbench?
Despite the image above, I’m not referring to a bench you can work on… Workbench is a web-based suite of tools that enables Salesforce admins and developers to complete multiple actions via Force.com APIs. It provides many powerful features for Salesforce configuration, and is one of the preferred tools of our Salesforce team.
As a Marketing Automation consultant, I hadn’t previously worked with Workbench, until I had to use it to configure Connected Campaigns for one of my customers.
Why would we use Workbench for Campaigns?
In order to configure some of the recent features, Account Engagement admins need to make certain adjustments in Salesforce. The most common use case for such configurations is Connected Campaigns, which I am sure you have heard of before. If not, take a look at this article first, then come back here.
As mentioned in the official implementation guide, Workbench will be your go-to platform if you have many campaigns in Account Engagement without a Salesforce equivalent. With only one action, you can create those campaigns in Salesforce quickly, without any hassle.
What is needed to use it?
First of all, start the Connected Campaigns configuration in Account Engagement so you can download the list of unconnected campaigns.
In order to start the process, you will need access to Salesforce, with rights to create campaigns and use Workbench. If you are unsure, check with your Salesforce admin who can guide you through the necessary steps as well.
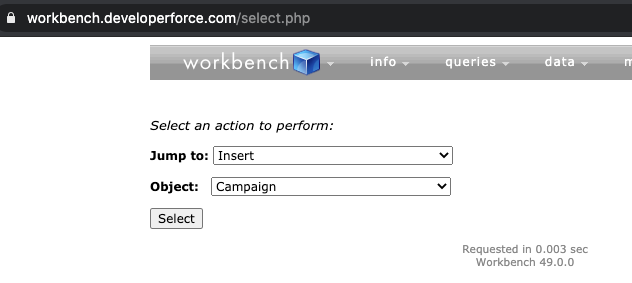
Step 1: Select the Insert Campaigns actions from the dropdown
Step 2: Attach the csv file that you exported from Account Engagement
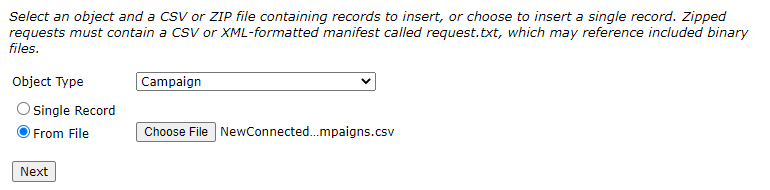
I recommend including the required campaign fields in your prepared csv, or Salesforce will use the default settings. This can help your users understand the details of previous Pardot campaigns.
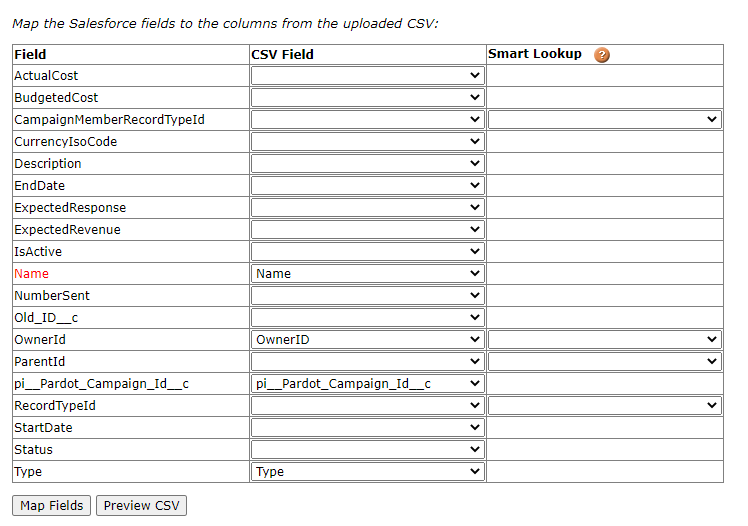
Step 3: Map your data to the Salesforce campaign object fields
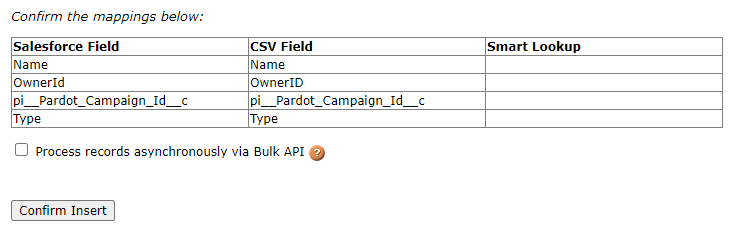
Step 4: Confirm the mapping and complete the action
Once you have finished the upload to Workbench for campaigns, Account Engagement will be able to find the campaigns in Salesforce and the sync will be complete.
In order to leverage some of the best new features of Account Engagement, configure Connected Campaigns in your account sooner rather than later. If you need help, get in touch and gain the best tips for great Salesforce and Pardot alignment.